Showing posts with label George. Show all posts

Tuesday, August 14, 2012

I HAD AN IDEA - ARTISTE, GEORGE, PINTEREST

Hi Everyone - I know I've said it before but I'll have to say it again!  I'm addicted to Pinterest.  But really, that's a good thing!  Part of the project I made today came from something that I saw on Pinterest.  It was instructions to create a flower pillow where you cut circles out of felt and fold them in half. This link will take you to a picture of the pillow:  http://pinterest.com/pin/30540103692586839/

I liked the looks of it so I thought I could do the same thing with paper!  Voila!

Using George, I cut a 3 1/2" circle out of white cardstock.  I then used a piece of two sided cardstock to cut out a page of 1 1/4" circles.  I then folded the circles in half alternating between the two sides.  Starting on the outside of the circle, I glued the folded circles until the whole 3 1/2" circle was covered. 


This is the finished circle.  When I started covering the circle, I didn't know how I was going to use it.  Then I thought of my new favorite cartridge, Artiste!!!

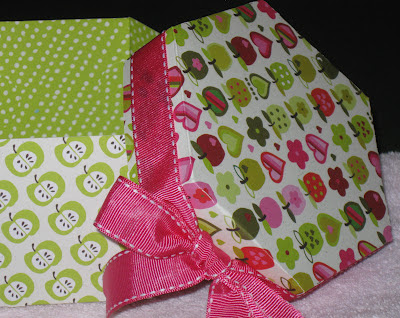
I created the box below cut at 3 1/4".  Simply pushed the buttons and glued the top together.  I created the bottom and found that the way the box is cut - the sides are not able to be glued together.  With my left over circles, I attached one at each angle - you can kinda see that in this photo if you look closely. 


Then I added ribbon around the top, tied a bow, and popped the circle on top.  


This is the finished project.  Mom has a new neighbor - she said she wanted the box to put cookies in as a "welcome to the neighborhood" gift. 

Thanks so much for stopping by!  We appreciate your visits and your comments.  If you would like to order the Artiste Gift set, follow this link to order.  The kit includes the Artiste cartridge, three sets of stamps, and 3 pages of chipboard cut outs for $99 - it is Sooooooooo worth the money!!

I am going to enter it in these challenges.
Make it Monday - always Anything Goes
Paper Pretties - SIO - Anything Goes
Whoopsi Daisy  - SIO - Anything Goes
No Matter Which Challenges (knew as Let`s Ink It Up) - M, F - (Aug) Anything Goes (ends 26th Aug)
One Stitch At A Time - SIO - Anything Goes

Please come back tomorrow - so until another day, God Bless You!  Donna 

Sunday, April 1, 2012

Midnight Madness Sketch Challenge #137 - Use At Least One Flower

I've had to take a break from my design team work during my move but I was able to complete this one for the Midnight Madness Sketch Challenge #137.  Priscilla has changed this challenge blog a monthly challenge so you will have plenty of time to participate.  She would like it if you used one of her images but it is not a requirement.  You must use at least one flower in this month's challenge.  I used her Sunflower image for my flowers.
 I have used the other image, Victoria, earlier but I thought she worked perfectly with Priscilla's sunflower.

Card Recipe:
5X6.5" card base
Background Paper - DCWV's Denim Stack & some digital gingham paper.
Digital Images - Priscillastyles Sunflower and Sugar Nellie's Victoria
Ribbon 
Red gems
Promarkers used to color Images:
Sunflowers - Gold, Sunflower, Umber - Black Stickles for the seeds
Victoria's Jacket - Denim, April Blue (Limited Spring Color) Powder Blue
Shirt - Lipstick Red, Cool Grey 1
Face - Satin, Coral
Eyes - Fresh Meadow (Limited Spring Color)
Hair - Mustard, Buttercup
Sunflowers - Same as above
Hat - Pastel Beige, Khaki

As always, you can use either sketch for your project.  These are the two sketches for this month.
 Clean and Simple
 Fancy
Thank you for stopping to visit today.  Thank you for bearing with us during our absence.  We appreciate your comments and visits.  God Bless You!!! Peggy

Thursday, January 19, 2012

It STINKS To Feel Bad - Elegant Edges, George, Doodle Pantry

HI Everyone - SURPRISE!!!  We are still alive!!  I made the card below for a friend of my son, Jacob.  Kobi and Jacob have been friends since Kindergarten.  Kobi had eight teeth pulled and other dental work done today.  Yes, I said OUCH too!!  That seemed like a lot for a ten year old to go through so we made him this card.

To make this card, I used the Quirky Skunk (colored) and the Quirky Skunk papers from Doodle Pantry.  Now isn't she just the cutest??


1.  I covered a craft paper card with striped patterned paper.
2.  Cut an orange rectangle to cover the striped paper then adhered dotted patterned paper on top of that.
3.  I adhered the colored digi to a scalloped circle cut with the Elegant Edges cartridge
4.  I then cut two patterned paper circle with the George cartridge.
5.  I cut two more scalloped circles with the Elegant Edges cartridge which I adhered to the patterned paper circles.
6.  I popped all these on the front of the card.
7.  I added bling in the top right hand corner.


On the inside, I cut a strip of stripped paper and punched the border with the Thread Water punch.  I cut an oblong frame with Elegant Edges and adhered it to a green squre of paper.  Sentiments were created with Word.

Thank you all for your patience with Mom and me.  We have missed posting on our blog but have been extremely busy.  Mom got an offer on her house so we've been trying to find her a place to live near me.  YEAAAAA!!!  Thank so much for stopping by - we do appreciate you!!

Until another day, God bless you!  Donna

Sunday, January 1, 2012

Have A Mice Day - Stamping, George, Doodle Pantry

HAPPY NEW YEAR, EVERYONE!!!!  We hope that 2012 brings you peace and happiness! 

With the New Year, comes new digi stamps from Doodle Pantry.  When I saw this little Quirky Mouse, I just had to smile.  To make the card:


  • I used two postage stamps on the Stamping Cricut Cartridge and welded them together using Cricut Craftoom. 
  • Using the George Cartridge, I placed several different size circles on the cardbase to make it look like cheese.
  • I tied orange ribbon on the front of the card and tied blue and orange bows. 
  • I printed the colored mouse and sentiment and adhered them to blue cardstock then popped them on the front of the card.
  • I used the negatives from the holes on the inside of the card.
Now isn't he just the cutest??  Please jump over to Doodle Pantry to view all the new digi stamps Laurie has to offer.  You'll be glad you did - there's even a little workout birdie that'll inspire you to either craft or work off some of those holiday pounds.  You'll also find information about free digis you'll receive with any purchase and challenges.

As I said before, Happy New Year!!  May all your wishes and resolutions come true!!  Please come back another day, we appreciate your visits and comments.  Mom and I are working on a schedule of projects for the new year.  Until another day, God Bless You!!  Donna

    Challenges:


    Thursday, December 15, 2011

    A Child Is Born - George, Digital Delights by Louby Loo

    Hi Everyone – It’s been a long time since I posted something.  For my post for Digital Delights by Louby Loo, I chose to use the set, “A Child Is Born.”  The inspiration for my card came from the blog  Everyday Cricut. 


    To form the cardbase, I used Cricut Craftroom and George to weld together the rounded triangle, rectangle, and squares.  I covered the cardbase with green cardstock.  I then printed off all the digis and cut them out. 


    I adhered the sentiment to the front of the card, the 3 Wise Men to the middle layer of the card, and all the other digis to the center of the card.  During this time of year, we all need to remember the real reason for the season.  
     
    Challenges for this card: 
    Christmas Inspirations - must be Christmas - Folded card 
    Come and Get It Challenges - Colours: Red, Green. Your Choice.
    Gingerloft Winter OR Christmas 
    One Stitch At A Time - SIO - Use a Digi  
    Paper Sundaes - Anything Christmas  
    The Squirrel and the Fox - Christmas   
    Bunny Zoe's CraftsFancy Folds/Shaped Card   
    Creative Stamp Friends -  Christmas
    Crafty Boots - Christmas    
    Hooked on Crafts - Christmas
    Make it Monday - always Anything Goes 
    My Craft Spot - 1E - Christmas Shape Cards 
    The Crazy Challenge - More than One Fold
    Truly Madly Crafty Challenges - Christmas Image  
    Victorine Originals - Christmas Colours
    Partytime Tuesdays -  Red and Green Christmas


    Thank you for stopping by today.  I’m like Mom – I think this will be my LAST Christmas card this year.  We appreciate your visits and your comments.  Until another day, God Bless You!!  Donna

    Tuesday, December 6, 2011

    Midnight Madness Challenge 133 - Catching Snowflakes

    This week will be the last week we post on the Midnight Madness Sketch Challenge for the year.  Priscilla is going to revamp the Design Team and her blogs for the new year.  Today's post is for MMSC #133

    Card Recipe 
    5X6.5" card base
    Background paper is Christmas paper from my stash.
    Image - Catching Snowflakes by Priscillastyles
    Oval and Circle - Cut from George & Basic Shapes Cricut cartridge
    Snowflake brads
    Gems
    Stickles - added to hat fur trim.
    Promarkers uses-
    Hat  - Pink Carnation, Fuschia, Lime Green, Pear Green
    Hair - Buttercup, sunflower
    Skin - Blush, Coral
    Gloves - Pink Carnation, Fuschia
    Sweater - Forest Green, Pine
    Here are the sketches for this challenge.  As usual you can create it Clean and Simple or Fancy.  I hope you will join us at Midnight Madness today.
     Clean and Simple
    Fancy

    Challenges for this card:
    Crafty Sentiments  Snowflakes 
    Create Me Pink Challenges - Christmas Colours (Red, green, silver and/or gold)
    Creative Card Crew -  Tis The Season
    Ladybug Crafts Ink TLT Challenge - #49 Snowflakes & Sparkle
    Paper Take Weekly - Anything Goes
    Top Tip Tuesday -  #63 Let it Snow
    Tuesday Throwdown - #77 Celebrate The Season

    Thank you for dropping by today.  Pray for my sister.  She lost her husband Monday.  The funeral is tomorrow.  God's Grace is sufficient.  God Bless You!!!  Peggy

    Thursday, November 3, 2011

    POPPETT - SOPHIE AND DIGITAL DELIGHT BY LOUBY LOO

    Hi Everyone!  I must say that I think the digi that I used on today's card is one of my favorites.  I think it's adorable.  I might just use this card as my prototype for my Christmas cards this year.  And no, I haven't even started those yet!!


    I used the Sophie Cricut Cartridge to cut the card base - notice the Christmas trees along the border.  I covered the cardbase with DCWV Christmas Paper.  I colored the digi (isn't he cute?) with Promarkers.  I then cut out the digi in a circle using the George cartridge and then cut another circle slightly bigger.  I used the Sophie cartridge to cut out a scalloped circle which I mounted the digi on.  I popped all three layers in the middle of the card after tieing a Ho-Ho ribbon around the card.  Then I added bling to the top right corner. 

    On the inside of the card (which you can't see in this picture), I adhered a strip of the same Christmas paper used on the front of the card.  I then used the Martha Stewart Snowflake punch along the inside border.

    Thank you for your visits and your comments.  Please drop by Digital Delights to see all the new Christmas digis that Wendy has created.  She is very talented!!

    Until another day, God Bless You!!  Donna

    Tuesday, November 1, 2011

    DOODLE PANTRY NOVEMBER RELEASE - GEORGE

    Hi Everyone!!  Today is an exciting day over at the Doodle Pantry website as Laurie has many new digis in her store.  She has something for everyone.  I had a hard time choosing which stamps I would use to make a project but I finally decided on the two below. 

    The first one is Pilgrim Sheep (Colored).  Each of the sheep comes separately but for this card, I placed them together and printed them off.  I cut them out in a circle at 4 1/4" using the Georgia cartridge.  I then cut another circle out at 4 1/2" and popped the sheep on top. 

    I used Laurie's digi papers to cover the cardbase.  The sentiment comes in the set with the sheep.  Jacob and his friend, Luke, made the pumpkins that are in the picture.  Luke spent the night with us on Friday and he wanted to make something for his Mom - so I had them make the pumpkins to go with the card.

    My next card was made using the Wishbone Ants from the new November Release - now this digi does not go on sale until November 25th so this is just a little preview of this digi.
      
     
    Now aren't these ants the cutest??  They seem to always be getting into something.  I again covered the cardbase with Laurie's digi papers that come with the Wishbone Ants set, added ribbon, and a sentiment that also is included with the Ants Set. 

    Please hop over to Doodle Pantry and check out the new releases.  I'm sure you'll find something that you like. 

    Thanks for stopping by our blog!!  I don't know about you but I'm glad my Mom is back home!!  I get to have a girls only weekend with her this coming weekend along with some other Cricut crazy women.  I can't wait!!  We hope you'll come back and visit us another day!! 

    Until another day, God Bless You!!  Donna

    Wednesday, October 12, 2011

    Pumpkin Bouquet - Fancy Frames and Picturesque

    In trying to decide what to make as my entry today, I did a search of my hard drive to see what kind of files I had on Fall or Autumn.  Lo and behold, I found this lovely little digistamp called Pumpkin Bouquet.  I have had it a long time and forgot I had it (ever do that?)  It came from Fred She Said group on Crafter's Digital Art Center.  It is perfect for what I wanted to make.

     Donna and I have been discussing that we need to start making something with our cartridges that we have never used.  So for this card, I wanted to do a frame so I got out Fancy Frames.  First I colored my digi with Promarkers.  Then I decided on  my paper (which is probably not the best order to use).  I have had this paper stack a long time too.  It is called Mango Frost by DCWV.

    I wanted a round frame for the image.  The border on the one I chose was too wide so I used Cricut Craft Room and hid the inner cut.  Next using the circle from the George and Basic Shapes cartridge, I stretched the circle until the frame border was just right.  I cut 2 of them.  I used a Martha Stewart Circle Cutter to cut out my digistamp and glued one frame over it.  I inked all the edges of my cuts with Color Box Turquoise Ink.  The corners were cut from the Picturesque cart (this cart has some beautiful cuts on it) and inked with turquoise ink.   After adhering all the elements to the front of the card, I applied foam adhesives (pop dots) to the second frame and placed it over the first one.


    This is a close up of the frame.  Can you tell how adding the pop dots makes it look 3D?

    This is the inside of the card for the sentiment.

    Challenges for this card:
    Digital Tuesday - include a digital element - #132Fall Colours

    Crafters`s Cafe Progressive Challenge - Fall 

    Nettie G's Digital Gems -  Fall/Autumn
    Stamps R Us - Autumn/Fall
    Woodware USA - Anything Goes (again) 
    I Love Promarkers - Must use Promarkers - #87 Fall colors
    Delightful Challenges -  Photo Inspiration* Colours of Fall

    Shelly's Images - SIO - Haloween or Autumn 

    Thank you for your visits each day.  We appreciate your support.  God Bless You!!!  Peggy

    Thursday, September 22, 2011

    BEE HIVE LARRY - GEORGE, ACCENTS ESSENTIAL, DIGITAL DELIGHTS

    Hi Everyone - I must say that I love this little bee - I think he's a cutey!!  You can find Bee Hive Larry over at Digital Delights by Louby Loo along with a lot of other great digital stamps.  I wanted to make a card with Larry because when I bought my first Cricut machine several years ago, I downloaded a file to be used in Design Studio that will cut a honeycomb pattern in the card.  I had always liked the file but had never used it.  Kinda like alot of the "stuff" I have in my Happy Space.  But I digress!

    I cut this card using my Cricut Expression.  The cut file uses George and Accent Essentials to cut the cardbase.  I colored two of Larry and his honeycomb using Promarkers, then cut them out and pop dotted them for dimension.  I added a bumble bee brad above the honeycomb.  Very simple but still very cute!!

    I think I'm going to make him into a Thank You card for a friend of mine.  Maybe I'll put the sentiment of "Just Beeeecuz" on the outside and on the inside "You're as sweet as honey!"  Too cuuutttee!!!

    I've had the cut file for several years and do not remember who made the cut file and who I downloaded it from.  So if it's yours, thanks so much!!  If you would like the cut file, please leave me a comment and I'll send it to you!  

    Challenges I will enter this card in:
    Crafting For All Seasons -  Fall Colors
    Scrapbook Sisters - Autumn Colors
    Anything Goes Challenge Blog - Anything Goes


    Thanks for stopping by and taking a look!  Please come back tomorrow and bring some friends with you!  Until another day, God Bless You!!  Donna

    Friday, August 12, 2011

    I Have Happy Feet

    Have  you ever made a flap card?  They are very simple yet give you a different look in a card.  I hope you will want to make one after looking at how easy they are to make.   This is my flap card.
    I started in Cricut Craft Room, welded a 4" scallop circle from the Bloom Lite Cartridge to a 4X9 rectangle from the George cartridge.  The total length of the scallop and rectangle should be 4X11.  I then chose a 4" scalloped oval frame from the Ashlyn cartridge.  I used the hide contour feature and hid the inside line so it would cut a solid scalloped ovalThis can also be done in Design Studio and on the Gypsy.

    This is how it looks when cut.  I chose Basic Grey Euphoria for my background paper.
     Turn 11" card base over.  Score at 4 1/4" and again at 8 1/2".  Fold on scored lines.  
    Decorate the scalloped oval with anything you like. I chose this darling little image and colored her with Promarkers. She is another free digi offered in the CDAC Progressive Challenge.  Check it out.
    This is the inside of the card.  The embellishments are from Basic Grey Euphoria.  The scalloped circle is from the Bloom cartridge.

    Attach decorated scalloped oval to the flap. 

    I hope you will try this little card.  I would love to see what you make.  Thanks for your visits and comments.  God Bless You!!! Peggy


    Tuesday, August 9, 2011

    BACK TO SCHOOL NOTECARDS/PURSE - MY COMMUNITY, CELEBRATE WITH FLOURISH

    Hi Everyone!  School will be starting back soon so I thought I would make something for Ms. Pennington who was Jacob's teacher last year.  Just a little something to welcome her back to the new school year.  I tried to find out today what class Jacob will be in next year so that I could make his new teacher a little welcome gift too, but no luck.  They keep those lists locked up like Fort Knox until Open House the week before school starts. 

    I found the instructions for a card purse on Splitcoaststampers.  The directions were very easy to follow.  Here is the link to the website

    I've ALWAYS loved the smell of a new box of Crayons.  We were shopping for school supplies this weekend and Jacob caught me sniffing a "new" box of Crayons.  He said, "Mom, what are you doing?"  So I explained my love of the smell.  YES, he did think I was crazy but I digress.  So it was with that thought of crayons that I decided to make the notecards/purse below:

    Using Design Studio, I welded the square and tall rectangle from George and the Crayons from My Community together to form the notecard.  The picture below is the screen shot of the cut file in Design Studio.  I have this cut file saved and would be willing to share with you - all you have to do is ask.  I cut the notecards out of primary color cardstock - red, orange, and yellow.

    I cut the layers for the crayons out of pattern paper to match the front of the notecard box.  This is included in the cutfile along with the words "Back To School" from the Celebrate From Flourish cartridge.  

    I think they turned out cute and the only thing missing from them is the "crayon smell."  Love it!!

    Well, thanks for stopping by and we hope you'll come back again!  Like I said, if you would like the cut file, please let me know and I'll send it to you.  I think I'll go color something!  Until another day, God Bless You!!  Donna

    Friday, July 22, 2011

    A Quick Imagine and Cricut Purse Card

    I've been playing around with the beta version of Provocraft's Cricut Craft Room.  "Playing" is the operative word here.  I can't get my Imagine to cut with it.  However, I did get my E2 to work with it.  If they can get all the bugs out of it, it will be a very good product.  I hope they don't release it before it's ready.

    I used CCR to design the Cricut Card below.  This first card I made with the Imagine.  These are just fast and simple cards.  

    Card Recipe
    Imagine Cartridge Better Together - Purse card is from the Bonus Content.  Cut at 10".
    George Cricut Cartridge - Circles cut from gold glitter to make clasp on top of purse.
    Prima flowers on front 

    Card Recipe:
    Background paper - Anna Griffin Carolina Collection.  I chose a multi-pattern paper.  It reminds me of a Vera Bradley purse I have.
    Forever Young Cricut cartridge - Page 56.  Weld two of the Purse2 features together at the bottom.  Then fold to make card.
    George Cricut Cartridge - cut circles from gold glitter paper for the clasps on top of the purse.
    Prima flower for the front.


    Like I said these are fast and simple but they would make a good card for a young lady.  I'm thinking of one of my little nieces.  Thank you for visiting with us today.  We will look for you again tomorrow.  God Bless You!!! Peggy

    Tuesday, June 14, 2011

    Midnight Madness Sketch Challenge #108 - Elegant Edges

    I told myself yesterday that I was going to make a card today without using Elegant Edges.  However, it seems every time I have a need for a label or frame I reach for it.  This card was no exception.  I made it for the Midnight Madness Sketch Challenge #108 at priscillastyles. 


    Card Recipe:
    5X6.5 Card Base
    Background Paper - Basic Grey Blush Stack
    George and Basic Things - cut squares for front of card @ 1.5"
    Elegant Edges Cricut Cartridge - Page 44 - Oblong feature - cut at 4.5".  I used the same cut for the inside @ 6.5" which was perfect.
    For the inside I inked the edges with Merlot Color Box Ink.
    Digital Image from priscillastyles store - Victorian Fan Rose 
    Promarkers used to color image:
    Flower - Lipstick Red, Ruby, Crimson
    Leaves - Forest, Pine, Bright Green


    Challenges I will be entering my card in, in addition to MMSC108:
    Lexi's Creations - No Sentiment
    Make It Monday - Anything Goes 
    Totally Gorjuss - Flower Power

    Thanks for taking a look at my entry today.  I love your visits and comments.  God Bless You!!!!  Peggy


    Wednesday, March 16, 2011

    Fluttering By To Say...

    Welcome to our new followers and to our regular visitors.  We hope you find some inspiration to get your creative juices flowing.


    Hi Everyone - I made this card to enter the Sketch Challenge on the CDAC website.  I made this card for the best boss in the world who just happens to be my boss.  She is always doing things to show me her appreciation so I made this card to say thank you.

    I cut the scalloped circle using the Bloom Cricut Cartridge at 4 3/4" and the regular circle with the George Cartridge 4 1/4".  The digi was provided in the challenge and I colored the butterflies with the following Promarkers:

    Pastel Green
    Mint Green

    Thanks for stopping by our blog today.    Until another day, God Bless!  Donna

    Donna and I were working on this challenge at the same time.  We did not discuss how we were coloring this image.  It amazes me sometimes that we choose colors so similar even though we're miles apart.  I love her card.  Ms. Jean is going to love it.  Here is my take on the image.

    Materials used:
    5X6.5" card base
    Background papers - GCD Studios Ella Blue
    Flowers - Mother's Day Bouquet- Petals cut at 1", .75" and .5"
    Jewels for ceners
    Scallop - Bloom Cricut Cartridge - cut at 5"
    Circle - Bloom Cricut Cartridge - cut at 4.5" 
    Embossing on card base - Cuttlebug Kassie's Brocade - I don't think you can see much of the embossing on my card.  
    Promarkers used:
    Butterfly - Powder Blue, Pastel Blue, Carmine, Canary, Bright Green

    I do hope you will come back tomorrow.  We love your visits and comments.  God Bless You!!!  Peggy

    Tuesday, March 1, 2011

    Sweet Dreams Baby Book - LOTS OF CRICUT

    You know there's nothing like a newborn baby to make you smile!  Jacob's teacher, Ms. Pennington, is expecting her first grandchild this week so I decided I would make her a brag book for some of her photos.  I don't know about you but I've never met a grandmother yet that didn't have plenty of pictures of their grandchildren to show you.


    For this project, I used LOTS of Cricut Cartridges.  I found a Rusty Pickle Chipboard Album that I bought at one of the CKC conventions that Mom and I attended.  I used the Basic Grey Oh Boy Collection to cover the chipboard with 6 x 6 1/2 pieces.


    Book Recipe

    COVER:Frame - I used Design Studio to make the frame using the George Cartridge.  I welded two squares together then welded stars inside the frame.
    Used Create A Critter to cut:
    Sheep - 2 1/2"
    Sweet Dreams - 1 1/2"
    Clouds - 1 1/2", 3/4"
    Stars - 1 1/4"
    Moon - 1 1/4"


    Popped the sheep and one of the clouds to add dimension.


    PAGES 2 AND 3

    Baby Blessings - cut at 1.5 x 3.8" with Wild Card and Design Studio
    Heart Border - Martha Stewart Heart Lace Punch
    Train - 1 3/4" - Create a Critter


    PAGES 4 AND 5

    Rocket - 6" (page), 4" (tag) - Just Because Cards Cartridge
    Wagon - 4 1/2" - Just Because Cards Cartridge


    PAGES 6 AND 7

    Bear - 2 1/2" - Doodlecharms
    Bottle Borders - 1" and 2" - Doodlecharms


    PAGES 8 and 9

    Giraffe - 4" - Create A Critter
    Lion - 2" - Create A Critter


    PAGES 10 AND 11

    Heaven Sent - 1 1/4" - Stamping
    Rattle - 1 1/4" Stamping

    I made pockets out of the mats where the pictures will be placed on several of the pages and inserted tags so that Ms. Pennington will have a place to make journal entries. 


    GIFT BAG

    Sheep - 6" - Create A Critter


    I really enjoyed making this book and I hope Jacob's teacher will like it. 

    Thanks for stopping by today and we hope that you've found some inspiration.  If you see something you like, please let us know.  Until another day, God Bless You!!  Donna
    Cricut Top 40