Saturday, December 6, 2014

Paper A La Mode Challenge - Use Your Favorite Color Combination

We haven't posted in a while.  It hasn't been because we haven't been busy because we have.  We will be posting some later, I promise.

Today is the Paper A La Mode Challenge at The Outlawz.  Our theme is Use Your Favorite Color Combination.  The sponsor is Squigglefly.  I know you will find something in their shop that you will like.  The image I chose for my project is called Three Stockings Waiting.  I wanted to make something besides a card.  I got an email from Splitcoast Stampers this week showing how to make a Star Box.  So I decided that would be fun to make.

Project Supplies:
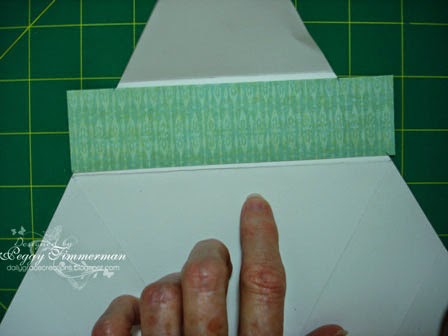
Star Box - tutorial on Splitcoast Stampers
KandCo. Designer Christmas Paper
Image - Three Stockings Waiting by Squigglefly
Embellishments from my stash
Promarkers used to color image:
Fireplace - Burgundy, Crimson
Stockings - Forest Green, Holly
Candles - Red, Berry Red
Holly - Leaf Green, Holly, Poppy
Candle Holders - Gold Glitter Pen
Pine Cones - Cocoa
Pine Needles - Pine
Wall - Almond Putty

I really appreciate those of you who continue to follow us.  Thank you for stopping by today.  I hope you will join us for this week's challenge.  

Another thing I would like to tell you about.  We've also started a Freebie/Progressive Challenge at the Outlawz.  This is a monthly challenge starting on the first day of each month.  We started Dec. 1.  Check it out here.

I hope you will have a great weekend.  Don't forget to worship in the place of your choice.  God Bless you!!!!! Peggy.


Saturday, November 15, 2014

Paper A La Mode Challenge - Snowman, Use Purple And Teal

Saturday Paper A La Mode Challenge is up and running.  We had good participation last week and I hope to see it again.  The theme is Snowman with a twist of Use Purple and Teal.  When I made my card, I forgot about the color twist and made red, white and black.  When I realized what I had done, I had to recreate it.  The sponsor this week is Squigglefly.  Please go to the challenge site and look at all the beautiful cards by the DT.

Card Supplies:
5X7" card base
Image - Snowy Card by Squigglefly
Cuttlebug Embossing Folder for the background
Sentiment - from Anna Griffin's Christmas Kitsch cartridge - Image #MB50F0 in Cricuit Design Space
Clear Glitter Pen -  I added glitter to the snowflake & flower on the Snowman image and the Merry Christmas but it didn't photograph well.

Thanks for stopping by today.  I hope your weekend is lovely.  It is very cold here so I'm trying to stay warm.  Thank the Lord for heat pumps.  God Bless You!!!!!  Peggy

Saturday, November 8, 2014

Paper A La Mode - Cute Christmas

It's Saturday so another Paper A La Mode Challenge begins at The Outlawz.  Our theme this week is Cute Christmas.  Our sponsor is Rick St. Dennis.  Rick has images of all types, something for a lot of different tastes.  My image for this week is Santa with Pipe.


Card Supplies:
4.75X6.75" card base
Background Paper/Sentiment - KandCo. from my stash
Image - Santa with Pipe by Rick St Dennis
Ornament Die - Anna Griffin Ornament Dies
Promarkers - for coloring the image.

I do hope you will join us at The Outlawz for this Saturday Challenge.  We have a different challenge everyday so there are lots of opportunities to win prizes.  Thanks for stopping by today.  I hope you have a wonderful weekend.  God Bless You!!!  Peggy

Monday, November 3, 2014

Christmas Card - Holiday Snowflakes

Provocraft came out with a new cartridge last week called Holiday Snowflakes.  It doesn't contain just ordinary shaped snowflakes but some of them tell the story of Christmas.  The one I used for this card is one of them.  It is Snowflake 41.  I was happy when I found out this cartridge was part of the Design Space subscription.

Card Supplies
5.5"X5,5" card base
Background Paper - DCWV Shimmer Stack
Cricut Cartridge Holiday Snowflakes-Snowflake 41
Star is from DS Digital Image Set "Stars"
Smaller stars are little round stickers I bought looong time ago.
Merry Christmas sticker

Here is a copy of all the snowflakes on this cartridge.

Donna and I had a couple of friends over Saturday to make Christmas ornaments.  Last week Donna posted some ornaments she made and when some friends saw them they wanted to come over and make some.  We had fun.  She made some pictures so I will get her to post them

Thank you for stopping by today.  It's always a joy to have you.  God Bless You.  Peggy

Saturday, October 25, 2014

Paper A La Mode Challenge - Anything Goes

Our sponsor for this week's challenge at The Outlawz Saturday Paper A La Mode is Sassy Studio Designs.  Our theme is Anything Goes.  To me that is the easiest theme.  I hope you will join us.  This is my design team card.

Card Supplies:
Card Base - Silhouette Cut File #54161-a2 Bracket Shaped Card resized to 7".
Image - Get Well Sassy by Sassy Studio Designs
Jute
Promarkers to color image

Thank you for stopping by today.  Donna & I have a trip to Michael's & Hobby Lobby planned today.  We have a Christmas Ornament making class planned.  Looking forward to this.  It should be fun.  God Bless You!!!!  Peggy

Thursday, October 23, 2014

HALLOWEEN IS IN THE AIR - Silhouette Cameo

Hi Everyone - well I told you that I had another project that I'd been working on for my husband's secret pal at work.  His secret pal loves all things Halloween especially bats!  So my husband asked me to make him some things to add to his Halloween decor.  

I chose this Halloween lantern because it had bats on it.  I put a LED tea light inside to light it up.  


My next project was a couple of pumpkins - aren't these cute??  These are simply scalloped circle glued together and then I cut out fall leaves and ran through the Cuttlebug.


The final project was a banner of alternating pumpkins, bats, spiderwebs - I think it'll look cute draped along a fireplace mantel.


Thanks so much for stopping by today - we appreciate your visits and your comments.  Until another day, God Bless You!!  Donna

Wednesday, October 22, 2014

DECORATING CHRISTMAS ORNAMENTS - Silhouette Cameo, Cricut Explore

Hi Everyone - can you believe that Christmas is just around the corner?  I know - it makes me feel a little sick to my stomach too!!  Now let me say that I LOVE the CHRISTMAS SEASON for the true meaning of Christmas in the birth of Christ.  I don't love it for all the hustle and bustle that the world brings to the Christmas season.

I've always wanted to decorate some of the plastic clear ornaments that are in the craft stores these days.  So Boss' Day was last week and my boss LOVES Christmas so I decided to decorate some of the Christmas ornaments for her.

Using vinyl, my Silhouette and my mom's Cricut Explore (which I LOVEEEE), I cut vinyl to decorate the balls.  Now, I will say that this is one of the EASIEST projects to make and it looks oh so pretty!!

I decorated the first ornament to look like Santa Claus.  I filled the inside of the ornament with red strips of paper.  For the buckle, I used rhinestones and formed a square.


The next ornament I cut out JOY for both sides of the ornament.  I filled this ornament with strips of silver glitter paper.


Next, I cut out Let It Snow and a Snowflake.  This ornament is filled with - no, not snow - epson salt. Doesn't it look like snow though?? 


Last, but not least, I cut out my boss' initials and filled with white sheer ribbon.


Once I finished all the ornaments, I made a box to house the ornaments.  I scored the paper at 2" and folded up the sides for the bottom.  I cut a piece of thick cardboard and covered with red paper and adhered to the bottom of the box to make it more sturdy.  


For the top - I cut out a scalloped square with my Silhouette and scored to form the sides.  Then I tied a very pretty red bow around it.  


Now, when I gave it to my boss this morning, she SCREAMED with joy!!  She LOVED it!!!  She loves when I make her things and she especially loved this because it was Christmas!!

Thanks so much for stopping by today!!  We appreciate your visits and your comments!!  Please come back tomorrow - I have another project to show you.  It's for Halloween and for my husband's secret pal at work!!  Until another day, God Bless You!!  Donna

Tuesday, October 21, 2014

Through The Craft Room Door Challenge - Star FoldCard

Today is the beginning of another challenge at Through The Craft Room Door.  The theme is always Anything Goes.  I hope you will join us this week.  The Design Team has some beautiful inspiration. This is my card for this week.

I found this card on a blog called Pysseltagen.  There is a tutorial there on the star fold card but I found a problem with one of the instructions for the the card in inches instead of centimeters.  So I decided to write it up as clearly as I can.  This design is not original to me.  The designer is Mary, also known as Bela Mio. This is my finished card.

First step is to take a 12X12 piece of cardstock.  Mark the center on one side (6") on the edge and then about 2 inches down.  Draw a line between them.  Then measure from each corner to the line drawn where the end of the ruler touches the line.  If this is done correctly you will have a triangle with all sides measuring 12 ".
Cut out triangle.  Measure to center point (6") on all sides of the triangle.  Then draw a line connecting the points.  You now have your center triangle.

Next measure 2" from the points of the interior triangle on all sides.

 Score on the center triangle lines and the 2" marks.

Fold the score lines of the traingle in toward the card and the 2" lines out.
Tuck the ends of the cards into each other.  Now you have a star fold card ready to decorate.

Measure the edges of your inside triangle to determine what size your strips of decorative paper need to be.  You will want to cut them a little smaller so they will fit and have a border around them.  I chose 2 designs from the KandCo. Classic K. Bailey Stack.


You will need 6 strips of paper measuring in the neighborhood of 5 3/4" X 1 3/4".  Make sure before you cut them.  Lay each one on the 2 " strips to find the points at which they need to be cut to fit the panels.

 Cut between the marks to form an angle.

Place 3 of the strips on the outside of the card and 3 on the inside of the card.

On a  coordinating piece of designer paper, trace the end triangles.  Cut inside of the lines to assure fit and a little border around the piece of paper.
Adhere to the triangle corners that will fold out on your card.
Trace the inside triangle on designer paper.  I used two different patterns  and jaggedly tore them and pasted together.  This is the center of your card.  I inked around all my paper cuts with a $1.00 green ink I bought at Michaels.
This is your card before any more embellishments.  Now you are ready to decorate to your heart's content.  I will show you what I did but you can do anything you like.
I had some trim that I placed around the edges of the corner triangles.  On one of the corners, I folded a small doily twice, inked the edges with the same green ink I used on the paper cuts.  Added a large jewel and pearls.
 I used Mother's Day Bouquet to cut out these flowers.  I used 3 different types of flowers and staggered them.  I cut them at 1", .9, and .8.  
This butterfly is a cut from the Indie Art cartridge cut at 1". When I finished the card, I folded it, and place Liquid Pearls on two of the triangle ends to indicate the flight of the butterfly.
 This is the center of my card.  The sentiment label is an Imagine image.  I used a coordinating paper and white cardstock, inked the edges and decorated with left over flower cuts.  The sentiment is a wooden stamp I bought at Hobby Lobby.
Again, this is the finished product.  I hope this makes sense and you will give this a try.  Thanks for dropping in today.  We appreciate your visits and comments.  God Bless You!!!  Peggy


Monday, October 20, 2014

Party!!!!!
ARE YOU READY TO P-A-R-T-Y!!!!!!

Hope so, because we are having a huge party at the Outlawz!! Yes, you read it right!! A party! At the Outlawz!! 

We are just about to 3000 members! Woohoo!! And we hope that by the end of our celebration we will have our 3000 members and be on our way to 4000!!
The Outlawz ladies have been working hard and have a boatload of sponsors, lots of prizes, and some fun and games for you, too! I believe there is also an extra challenge or two!!
If you are here at this blog, then you have the opportunity to participate in our SCAVENGER  HUNT!!
Yes, each of us listed below has placed a clip art image on our sidebar! Write down what you see because on the OUTLAWZ  MAIN PAGE,  you will see a  black PARTY!  tab at the top under the Outlawz banner.  Follow the links to get to the Scavenger Hunt as well as the other activities that are going on.
 Let’s get started!
Here is the list of 14 DT members along with their blogs. Just visit each one and write down the Party clip art that is on the sidebar. You will  need this to complete the hunt!
If you get lost along the way, go back to the Outlawz Party tab and resume!

Andrea        http://andneil.blogspot.co.nz/
Janet          http://mainelycards.blogspot.com/
Kathi         http://kathstales.blogspot.com/
And here are the items you are looking for. They should be easy to find. Look on the blog sidebars near the top!
Pumpkins,  Party Balloons, Fireworks, Party Girl, Color Star, Party Penguin, Penguin Painter, Dancing Couple, Party Animal, Party Mask,  Party Hat, Party bunting/banner, Party Confetti, Party Gnome
Complete instructions for entering the Scavenger Hunt is on the Outlawz Main Page  PARTY! tab.  
Have fun!!!! And don't forget to see what other activities are going on during our Party Week!!

Saturday, October 18, 2014

Paper A La Mode Challenge - The Great Pumpkin

Bugaboo Stamps is our sponsor this week for the Paper A La Mode Challenge at the The Outlawz.  I hope you will come by and see the inspiration from our Design Team.  We have a new DT member, Rachelle Green and this is her first week to contribute to the PAM challenge.  I chose Bugaboo's "Pumpkins & Leaves".  


Background Paper - My Mind's Eye "Fall In Love"
Image - Pumpkins & Leaves by Bugaboo Stamps
Image colored with Promarkers
Pumpkin Frames - Silhouette Cut File 65964
Leaves in upper right corner - cut from coordinating paper from above paper pack.
Ink for inking edges.

Thanks for stopping by today.  We love your visits and comments.  I hope you have a wonderful weekend.  God Bless You!!! Peggy

Friday, October 17, 2014

For Our Little Fireman

I have a great nephew, Jacob (are you supposed to call them great nephews or grand nephews) who loves playing policeman and fireman.  My brother, who is his Papa, bought him a police uniform and Jacob wore it until it was too small.  Then he bought him a fireman's uniform.  I think Jacob still tries to get in the  police uniform.  Anyway, when I saw this little digi I knew it would be the perfect card for him.  I'm going to show you the card then tell you about the different pieces I used to make it.

The background is a scrap piece of paper I used under some leaves I was inking.  I looked at it in a whole new light with the little fireman on.  I think it looks like fire.
The digi is a Sherry Baldi image.  He's called the Fireman.  I colored him with Promarkers.  If you would like to know which colors, leave me a message and I will let you know.
The little dog I found in Cricut Design Space.  He's from the Create A Critter cartridge.  You can cut his individual layers but I flattened him, then print and cut him.  I love that feature of the Explore.  I can't seem to find time to play with it as much as I would like.

The Award is also found in Cricut Design Space from the Plantin Cartridge.  I opened it and created text on it, attached the text to the award, then the Explore wrote the message and cut the award.  I was quite pleased I figured out how to do that.  Love that part of it too.  This is the inside of the card.
I'm going to mail Jacob his card tomorrow.  I can't wait to hear what he has to say about it.

Thank you for stopping by today.  Please come back tomorrow for our Paper A La Mode Challenge at The Outlaws.  I'll be looking for you.  God Bless You!!!!  Peggy

Thursday, October 16, 2014

Saturday, October 11, 2014

Paper A La Mode Challenge - Monochromatic

At The Outlawz our Saturday Paper A La Mode Challenge is Monochromatic.  It is sponsored by Rick St. Dennis.  Rick is a monthly sponsor and I have some beautiful digis from him.  Some of his art is a little dark and I don't like it but I love his "hat ladies" and "fashion ladies".  He has a little to offer almost everyone.  I love the digi I chose for this card.  I think it's based on his niece.

Card Supplies:
Card Base, Die, Snowflake, Sentiment - from Anna Griffin's 2013 Holiday Card Set.  I didn't use all the elements to make my Christmas cards last year so they're coming in handy on other projects.
Image - Angel-Isabella Face by Rick St. Dennis.
Media used to color image:
Hair - Promarkers - Gold, Tulip Yellow, Primrose
Skin - Almond, Sunkissed Pink, Baby Pink
Gown, Shoes, Ribbon - Gold Gel Pen, Promarker - Cool Gray 1
Wings - Almond
Flowers - Sunflower, Tulip Yellow, Leaf Green, Forest Green, Cardinal Red
Eyes - Grey Green

This is a close up of the beautiful Angel-Isabella.

Thank you for joining us today.  I hope you will come on over to The Outlawz PAM Challenge and enter your beautiful 'monochromatic' projects.  I can't wait to see them.  God Bless You!!!!  Peggy

Challenges for this card:
Crafting At the Weekend -M,  E3,  Anything Goes
Kit and ClowderM (First Saturday of the month) Anything Goes
Little Claire's  - M,P15, 3E, SIO   #50 - Christma
Treasured Times Rubber Stamps & Scrapbooking - 2W (W2)  Anything Goes
Vandicrafts Artistry Challenge  W, E1 - #12: Anything Goes 
We Do Doobadoo Challenge-  2W, E2 - (W2) CHRISTMAS
Sister Act Card Challenge - WCards. - No. 78 - Anything Goes

Tuesday, October 7, 2014

Through The Craft Room Door - October 7-21

The challenge starting today on TTCRD is sponsored by Deedee's Digis.  Her digis are new to me but I really like them.  I hope you will participate in this challenge.  It's always Anything Goes.  To me anything goes challenges are the easiest.  I chose Deedee's 'Endless Beginnings' for  my project.  There was a colored digi, line art digi, and lots of sentiments with this set. 

Card Supplies:
5X5 card base - From the Cricut Cartridge - Creative Cards
Banner and Scrollwork - Creative Cards Cricut Cartridge
Image and Sentiment from Deedee's Digi's 'Endless Beginnings' Set
CTMH Ink - Olive for inking edges

I know this is a clean and simple card but it conveys the message I want to send my friend who is suffering from stage 4 cancer.  Unless God performs a miracle (which we're all praying for) he'll not be with us long.  It brings back so many memories of my husband's battle with cancer.  Those memories are etched in my brain forever.

Thank you, dear friends for stopping by today.  If you haven't seen the latest issue of Through The Craft Room Door magazine, please click on the video at the right of this post.  I hope your week will be blessed.  God Bless You!!!  Peggy 

Challenges for this card:
Artistic Inspirations - W, E3 - Anything Goes and/or Thankful
Crafting from the Heart - W, E3 - Always Anything Goes
Digi Makeover Challenge - W, SIO, must use digi - Anything Goes.
House of Cards - M, cards (CAS, Classic, Cute, Vintage), C10 - (OctoberPunch and/or Die
Love to Scrap - 2W, 3E, F, digi or real stamping - (Week 1) Anything Goes
Lunagirl Moonbeams - 2W, E3 - (Week 2Put a Bird on It
Make My Monday - W, C6 - (Week 2) Die cuts and/or Punches
My Craft Creations - 2W, Challenge links on top - (Week 2) Always Anything Goes
Not Just Cards - 2W - (Week 2) Always Anything Goes
Path of Positivity - M, any positive/inspirational project or idea welcome - (deadline Nov 2)Courage
Through the Purple Haze - W, E3, C10 - Shaped Card
Whoopsi Daisy - W, SIO - Things with Wings

Monday, September 29, 2014

Paper A La Mode Challenge - Add A Sentiment

Hi ladies, another Paper A La Mode challenge started Saturday on the Outlawz.  I'm a little late posting my card.  Our theme is Add A Sentiment.  Bugaboo is our sponsor.

Card Supplies:
5X6.5" card base
Image - Beautiful Blocks-Thoughts & Prayers
Cuttlebug Embossing Folder - from Damask Decor Set
Die - Anna Griffin Cut & Emboss Folder for the Cuttlebug
Doilies
Promarkers used to color image:
Flowers - Reef Blue, Capri Blue, Frozen Lake
Leaves - Olive, Pressed Leaf
Background - Almond

Please pop over and see what the Design Team has made for inspiration.  We have had more participation in the last few weeks and we're so grateful.  Hope to see you on The Outlawz.  God Bless You!!!!  Peggy

Eureka Stamps Challenge - Add Some Bling

I'm sure you know by now there is nothing I like better than bling, ribbon, lace, pearls, etc.  So when I found out the Eureka Stamp Challenge was to "add some bling" to my project, I knew I could do that.  What do you think?

Card Supplies:
6X6 card base
Background Paper - KandCo. Christmas paper
Images - Eureka Stamps Digi 35001 - Winter Set of 4 (I don't know why I always pick the digis that require the most coloring.  You think I would learn.
Ribbon
Stickles
Promarkers and Glitter Gel Pens used to color images:

Holly - Cardinal Red, Red, Berry Red, Lipstick, Holly, Forest Green, Gold Gel Pen
Pine Cone - Pine, Holly, Walnut, Cocoa, Caramel, White Gel Pen
Poinsettia - Cardinal, Berry Red, Red, Marsh, Lime, Gold Gel Pin, Stickles
Snow Flakes - Clear Glitter Gel Pen, Powder Blue
Backgrounds - Powder Blue

Thanks for visiting with us today.  I hope you will come over to our challenge and join in.  God Bless You!!!!  Peggy
Cricut Top 40