Showing posts with label Paper Lace. Show all posts

Monday, January 27, 2014

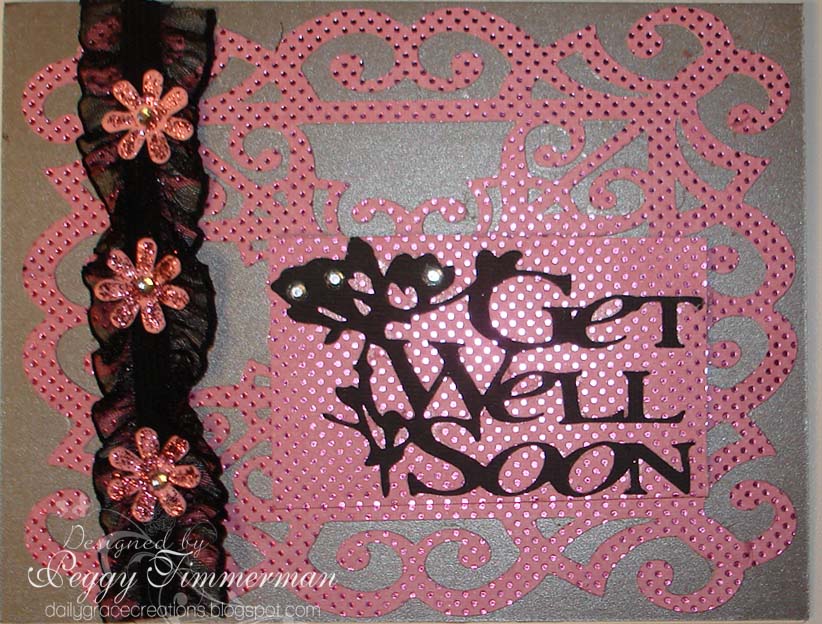
Get Well Soon - Cricut, Silhouette

I have been trying to learn some more about my Silhouette Cameo.  I searched YouTube over the weekend and found a lot of videos.  I decided on learning how to use the sketch pens.  I ordered the starter kit a while back & had not tried them.  I especially like the videos showing how to color different elements with different colors.  Very interesting.  I decided on a card by Samantha Walker.  It has a delicate lacy look if you cut it.  I wanted to see what it would look like if I used the sketch pens instead of the blade.  Here is what it looked like.  


After I had drawn the background, Donna told me a friend of ours was in the hospital.  So I decided to make her a card using my sketched card.  Very simple but cute.

Card recipe:
Card Base - Samantha Walker's A5Card - Rows of Lace
Doily Background - Cut from Paper Lace Cricut Cartridge
Sentiment - Sophie Gallo's Get Well Soon - Silhouette Online Store. I added Crystal Stickles to it to give it some sparkle.
Floradoodle Flowers
Leaves were punched with a MS punch.

Thank you for stopping by today.  I pray your week will bring you lots of joy.  God Bless You!!!  Peggy
 

Friday, January 17, 2014

Card Inspired by Enfys Cashmore

Enfys Cashmore of Going Buggy is an amazing designer.  She has been posting projects using votive candle borders she found at their Hobbycraft store in the UK.  They are beautiful.  I tried to find them online but could only find them at the Hobbycraft site.  Unfortunately, they do not ship internationally.  So I reminded myself I have LOTS of Cricut cartridges that I could use to make a border.  I used Enfys' card as my inspiration.  Her's is gorgeous but I like the way mine turned out too.  If you click on the Going Buggy, you can see her card. 
 Card Recipe:
A2 Card Base
Anna Griffin Cuttlebug Embossing Folder - emboss the front of the card.
Border - Paper Lace Cricut Cartridge
Leafy Branch - Artiste Cricut Cartridge
Flower - Mother's Day Bouquet Cricut Cartridge. Flower cut at 2" to 3.5" increasing .25 in. for each layer.  I used a page from the DCWV French Country paper stack. 
Gems 

Thank you for visiting with us.  We hope your weekend will be restful & blessed.  God Bless You!!!  Peggy

Sunday, July 7, 2013

Sherri Baldy Image #799

I have had a busy crafting weekend.  I worked on several cards and helped Donna make a Stationary Box this afternoon.  I hope she will get it finished this week and post it.  The first card I want to share with you features one of Sherri Baldy Besties Images.  It doesn't have a name, just a number.  It's # 799.  These big eyed images are so adorable.  


Card Recipe:
5"X6.5" card base made from teal green cardstock.
Doily - Cut from Paper Lace Cricut Cartridge.  The doily is actually round but I used Cricut Craft Room to manipulate it to make it oval to enhance the image.  I cut it from lavender cardstock.
Gemstones 
I left the right bottom corner open to stamp a sentiment when I send it out.  I usually leave the sentiment off until I see what kind of card I need it to be.
Promarkers used to color image.
Hair - Raw Sienna, Mustard, Tulip Yellow, Primrose
Skin - Sunkissed Pink, Blush, Baby Pink
Eyes - Green Shoot (Limited Edition Color)
Dress - Spring Lilac(Lmt Edition Color), Lilac, Amethyst, Tea Green, Grey Green
Hose - Tea Green, Grey Green
Ribbons - Tea Green, Grey Green, Lilac
Flowers - Fresh Bloom, Orchid, Spring Lilac
Shoes - Tan, Caramel

Here is a closer look at the digi.
Challenges to enter this project it:
 Colour Me Creative Challenge - Anything Goes

 Thank you for visiting with us today.  I hope you found something to inspire you.  God Bless You!!!! Peggy

Friday, October 14, 2011

Cricut Circle Blogaversary Sketch Challenge

About an hour ago I found out about the Cricut Circle Sketch Challenge.  Where have I been.  Anyway, I have to have my card posted before 11:59pm.  I think I will make it.  This is my card.  I will have to be brief to get it posted on the circle blog.

I used the same Imagine image from Imagine More Cards cartridge I used on my Box Card yesterday.  I pop dotted it for dimension.  The smaller flower is from Paper Lace - page 32, Lace 2 feature.  I cut several of them and stacked them.  My paper is from the KandCo Classic K Bailey stack.  I used Liquid Pearls for the center of the flower and the 3 dots on top.  I also use a Martha Stewart Deco Fan Edge Punch for the trip on the paper pieces.

Thanks for stopping by and please forgive me for being so brief.  I have to say this is the fastest I ever made a card.  Not my best but it meets the criteria of the sketch.  I hope Donna gets one done.  I called her when I found out about the challenge.  God Bless You!!!  Peggy

Wednesday, June 29, 2011

Paper Lace Thank You

While Donna and I were together this past week, we were so busy with the Volunteer Banquet, looking at townhomes and activities afterwards, we didn't have much time for crafting.  However, Friday night we decided we were having withdrawals so we made this thank you card.  

Paper Lace has some of the prettiest sentiments  of any cartridges Provocraft has made.  This is a simple card and easy to make but I think it turned out very pretty.

Card Recipe:
A2 card base
Background  paper - DCWV Lemon Flower Stack - a beautiful new paper stack.
Paper Lace Cricut Cartridge for the Thank You and the shadow - cut at 3.75".
Yellow gems and butterfly from the $1 bin at Michaels
 Ribbon

Thank you for visiting with us today.  We love reading your comments and appreciate your faithfulness.  God Bless You!!!  Peggy

Wednesday, February 16, 2011

Card Sets/Another Blog Award

My hairdresser asked me to make her 25 Thank You cards.  She must have a lot of people to thank.  I decided to make them in sets. All the cards are A2 size.

 Supplies Used:
     DCWV  Mango Frost Paper Stack and Cardstock
     Labels cut from the Preserves Cricut Cartridge
     Martha Stewart Punches
     Ribbon
     Bling
     Small Flowers
     Thank You Stamp


This set was made using:
     DCWV Black Currant Paper Stack
     Thank Yous, Shadows and borders cut from Paper Lace Cricut
           Cartridge
     Ribbon
     Bling
 This set was made using:
     DCWV Mariposa Paper Stack and Cardstock
     Labels cut from Stamping Cricut cartridge
     Butterflies from KayandCo. Wild Saffron Embellishments
     Ribbon
     Martha Stewart Punches

This set can be used for a man as well.  I used the following:
     DCWV Denim Paper Stack
     Brads
     Corner punches 


Now for another Blog Award.

ScrapCrazyyyy  awarded us the Liebster Blog Award. Thank you, ScrapCrazyyyy.  I wish I knew her real name.  I don't like calling anyone crazy.  LOL

The Liebster Award is given to people with talent you admire but you feel they do not get the recognition they deserve.  The requirements are to award it to 3 more bloggers.  Here they are (in no particular order). Please check out these talented ladies and follow their blogs.

 Larelyn at Handmade from My Heart
Ruby at Ruby's Impressions
 Shelly at Shell's Space


Thank you for stopping by for a visit today.  I hope you can find something you can use in your crafting.  God Bless You !! Peggy

Friday, February 4, 2011

Fence Friends Birthday Card

First let me say, check back tomorrow, Donna has some news. 

You can never have too many birthday cards, especially when there are as many birthdays as we have in our family.  This is one I made this week.  OOPS!!  Sorry, left the picture off.

Card Recipe:

5X6.5"  Card
Fence Friends from Heart Song Design Shop 
Paper - KayandCo. Wild Saffron Paper Stack and Cardstock
Paper Lace Cricut cartridge - Happy Birthday die cut
Ribbon
Studio 18 Dimensional Stickers-Butterfly and Bee
Promarkers Used:
Fence - Tan, Cocoa
Squirrel - Cool Grey 1 and Cool Grey 3
Bird - Pale Blue, Denim
Flowers, Orchid, Amethyst, Gold, Sunflower, Cerise
Grass - Grass Green
Leaves - Leaf Green, Forest Green
Sky - Sky Blue

Thanks for dropping by today.  God Bless You!!!  Peggy

Wednesday, February 2, 2011

Thank You Cards - Paper Lace

Hi Everyone!! I'm happy to report that Jacob is feeling better and back at school.  I actually found a few minutes to make some simple Thank You cards using that wonderful cartridge, Paper Lace!  I'm trying to teach my son a little etiquette and to be appreciative when someone gives you a gift by sending them a Thank You note.  So I made him some cards to send to his Mamaw (my Mom whom he loves more than me but that's okay), his Aunt and Uncle, one of his cousins, and my boss.  I made all the cards similar but different.


Background paper measures 4" x 5 1/2"
Paper Lace Thank You Shadow - cut at 3"
Paper Lace Thank You - cut at 3"
Ribbon to match


 These cards are not all that fancy but the main point was the life lesson for Jacob.  He wrote a personal note in all the cards and signed his name.  He worked really hard on making sure that he had neat handwriting so everyone could read what he wrote.  He typically has awful handwriting.  I told him he must be destined to be a doctor.

Thanks for visiting us today!  We love visitors!!  Until another day, have a great day and God Bless!!  Donna

Thursday, January 6, 2011

Wild Thing, You Make My Heart Sing

Isn't that what you think about when you look at this digistamp?  Meet Gary, the Giftbearer.  He is a product of Bonibleaux Designs Digis.  This website deals mainly in male inspired digital images.  Gary was offered on Crafters Digital Art Center's Color Challenge.  To enter, we had to create a card with Gary using turquoise, green, rust and grey.  This is my rendition.

I created my card background using the above colors.  The brads on the side strip coincidentally already had those colors on them. 

These are the Promarker colors I used on Gary, the Giftbeater.
Shirt - Honeycomb and Spice
Skin - Satin and Dusky Pink
Hat - Midnight Blue and Cool Grey 2
Pants - Duck Egg and Turquoise
Shoes - Cool Grey 5
Gift - Olive and Pine
Flowers - Leaf Green, Baby Pink, Red, Canary and Purple
After mounting him on a label cut from Lacy Labels (it is the All Boy base cut) the white background seemed too stark, so I applied green chalk to tone it down and help it to blend in. 

The inside of the card is decorated using the following cartridges.
Frames - Lyrical Letters - 5X6.5 and 4.75X6.25
Hearts - Love Struck
Wording - Mickey Font, Locker Talk and Paper Lace

I hope you enjoyed meeting Gary today.  Thanks for stopping by and I hope you'll come again tomorrow.  God Belss You!!  Peggy

Tuesday, January 4, 2011

Bugaboo Birthday Card with Paper Lace

When I saw this digi stamp on the Bugaboo website, I knew exactly the card I would make using it and the person who would receive it!! I colored this stamp using my new Promarkers my mom gave me for Christmas! Simply LOVE them and my mom for buying them for me!!

To make this card, I cut a piece of cream colored cardstock at 6" x 12" and scored it at 4" and 8". I used my bone scorer to fold it into three sections and then used a Martha Stewart Border Punch on the front of the card. I then covered the front with purple pattern paper (try saying that three times real fast) and used the same punch on the edge as I used on the cream cardstock. I placed ribbon around the card to hold it closed when tied and then cut one purple mat and one cream mat to go under the digi stamp. I pop dotted Happy Birthday on the front.

As you open the card, you will see the word "Celebrate" cut at 1" using the Paper Lace cartridge - Page 68. On the far left side of the card is the sentiment and then for the center of card, I cut Happy Birthday located on Page 53 of the Paper Lace at 3".

If you've been thinking about purchasing the Paper Lace cartridge and havent' yet, let me recommend it to you. You'll love it - so go ahead and order it!!! You won't regret it (now how's that for enabling?).

Thanks for stopping by our blog and we hope you'll come again!! If you see something you like, let us know!! Until another day, God bless you!! Donna

Monday, January 3, 2011

Designed2Delight Challenge Entry

Faith at Designed2Delight has an an ongoing monthly challenge. You purchase the first digital image and for the remaining challenges you get the digital image free.  This is my first attempt at entering one of her challenges.  I needed to make a birthday card and thought the little cupcake would make a cute card. 

This is an A2 card.  I cut a background from the Paper Lace cartridge to cover the card.  I put tan mesh across the bottom.  After coloring the digital images with Promarkers, I cut them out and applied  them to the card.  I added a Happy Birthday sentiment and added a bling butterfly.  I popped the cupcake with pop dots.

Thank you for stopping by.  I hope we can all get back to "normal" (whatever normal is)  this week.  God Bless You!!!! Peggy

Thursday, December 30, 2010

Our Family - 2011 Desk-Top Calendar

A while ago we showed you the desk top calendar Donna made us for Grandparent's Day.  She did this for several years and used All My Memories calendar to make it.  Apparently, they quit making it because we haven't been able to find one anywhere.

While at Donna's this week, we decided we could make it ourselves.  This is our end product.
This is how we made it:

The base (this is what keep the calendar upright) measures 16.5 X 9.5.  If you can find stiff paper that length, score at 8.25" then score
11/2" on each side of this score line.  Fold on score lines to form stand for desk.  We didn't have paper we felt was strong enough so we improvised.  This is the paper we used.  It is good for making book covers.  It is available at Michael's and they put it on sale periodically.

We cut two strips, one at 9.75 X 9.5 and another at 7.75 X 9.5.  On the longer strip score at 6.75 and again at 8.25.  Fold on score lines so as to make a peak.  On the shorter strip, score at 6.75 and fold.  Adhere the two short ends together.  It should look like this.

This is the paper we used for the inner pages.  You can use quality cardstock but this is stronger. 


Donna is a whiz at WORD so she created our monthly calendars in it.  The pages are 9.5 X 6.5. 


 We then set about binding it with a Bind-it-all.  This is such an amazing machine to be so little.

We selected our pictures and began working on the backgrounds for them.  We would like to share some of the pages with you.  We will put cartridges used with them.
This paper is a brocade type with the corners punched with a Stamping Up punch.


This background is Paper Lace, page 25-Base Flower and Base Shadow cut at 5".


This was cut with Paper Lace-page 24-Quilt1 and Base Shadow cut at 5 1/4".
This is one of my favorite pages.  The background is cut from Lacy Labels - Flower 2 at 5".


We have so many pictures on this one we didn't have room for any cuts.  Most of these were made at Christopher and Stephanie's wedding.  The one over October is one of my precious late husband and our two wonderful children.


And just to show you the calendar is still standing at the end of the year, here is December.  The background was cut with Trim A Tree Ornament at 5.5".

I know this has been an extra long post and we're so glad you are here to see our project.  I hope you will try this.  God Bless You!!! Peggy & Donna

Wednesday, December 15, 2010

Thank You - Paper Lace


Hi Everyone! Well, my mom enabled me into buying the new Paper Lace Cricut Cartridge and I must say that I absolutely LOVE IT as much as my mom does!! There are so many things that you can cut with this cartridge and in so many different ways. Way to go Provocraft!!!

I used paper from the 6 x 6 stack of DCWV Linen Closet to cover the card base. I cut the Thank You shadow and cut out at 3". The ribbon was bought at Michael's for 1.00. Love those $1.00 bins.

Thank you for visiting and we hope you'll visit again soon. Until another day, God bless you! Donna

Thursday, December 2, 2010

Paper Lace Card Sets

I was happy when Provocraft announced the Paper Lace cartridge.  I knew it was one I would have to have.  It arrived this past Monday.  I immediately started making cards.  I wanted to make a couple of card sets.  Paper Lace made it so easy.  I will show you some of the cards I made.  This post will be picture heavy but I want you to see what intricate cuts you can make.  Also, there are 6 ways to cut Thank You, You're invited, Happy Birthday, Congratulations, Just Because, Thinking of You, Get Well Soon, Celebrate, Best Wishes and I Love You.  Can you tell, this is my new favorite cartridge.  All these cards were made with DCWV Black Currant paper which I bought after seeing a card made by Nana Donna.

I used Martha Stewart Doily Lace Deep Edge Punch to punch the borders for this card.  The celebrate is from the Elegant Cakes cartridge.  I added some Flora Doodles and stickles for bling.
Card 2 - I used Happy Birthday, Page 53, Lace 2 and Lace 2 Shadow in the Paper Lace handbook.  The lace is some I got at Hobby Lobby and I added Flora Doodles flowers.
Card 3 - I cut a 3.25 X 5 piece of paper and punched around it with MS Deco Fan punch around the page punches.  The base paper is an embossed black.  The Thinking of You is the base feature on page 56 of the handbook.  I did not use the base shadow because the punched piece emphasized the cut. 
Card 4 - I used Page 57, Lace 1 for the Get Well Soon.  The background is Page 30, Lace 2.  These shapes are shown square but I changed it to fit an A2 card (4.25X5.5").  It looks a little different than the handbook but still has a nice pattern.  The flower and the scroll are from Elegant Cakes.  I cut various sizes for the flower, then curled the edges up and added a gemstone.

Card 5- The Thank You on this card is Page 51, Lace 1.  I layered it over Gray background paper and wove the black lace throught it.  Then added pink gemstones.
Card 6- The borders on this card were cut from Page 42, Lace 1.  I stretched it to fit the 5.5 width of my card.  The celebrate was cut from Page 68, Lace 1. 
Card 7- The background of this card is Page 30, Lace 1 feature.  Again I stretched it to fit an A2 card.  I layered the Get Well Soon, Page 57, Lace 2 over a piece of the pink paper because it seemed to get lost on lacy background.
Card 8-  The Happy Birthday on this card is on Page 53, Lace 1 and Lace 1 Shadow.  The flourish under it is on Page 33, Lace1.  Ribbon again is Hobby Lobby.

I won't post the rest of the cards since they're similar to these.  I hope I haven't bored you too much but you can see what a great selection of cuts are in this cartridge.  Thanks for visiting our blog.  Hope to see you again real soon.  God Bless You!!!  Peggy


Cricut Top 40