Showing posts with label
Better Together Imagine Cartridge.
Show all posts
Showing posts with label
Better Together Imagine Cartridge.
Show all posts
I was talking to my sister-in-law yesterday. She told me she was sitting in her closet looking at her shoes wondering, "Where did all these shoes come from?" It seems we all have this shoe fetish, even my brother. We just love shoes. Anybody else out there like that. We've tried to analyze ourselves to see where this problem originated. Unsuccessful. Anyway, her statement inspired this birthday card for her. She's another September birthday.
Card Recipe:
5X6.5 Card Base
Background Paper - DCWV Lace & Linen Paper Stack
Shoes - Better Together Imagine Cartridge - I used the different patterns and colors from this cartridge to make them. Cut them at 1".
Ribbon - placed to create squares to showcase each shoe.
Sentiment- computer generated.
Stamp for inside - Close To My Heart Stamp Set - 4 My Friend
I like this stamp set. I have used it several times.
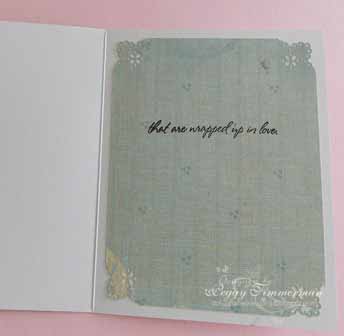
This is the inside of the card. I had some leftover cutouts so I used them as labels for the message.
I hope your week is going great. I have missed Donna, be glad when she gets home. Thanks for visiting today. I will try to have something for you again tomorrow. God Bless You!!! Peggy
You can never have too many birthday cards. Since most of my family has a birthday in the next few months, I'm getting some made. I used the Imagine Cartridge "Better Together" for the lady on this one.
Card Recipe:
Card Base: 5X6.5"
Background paper - KandCo. Classic K Bailey Paper Stack. I added stickles to some of the flourishes to give it a little sparkle. You know we like our bling.
Label - cut with Art Philosophy - 1 1/2". If you don't have Art Philosophy, you can use a label from another cartridge.
The Lady - cut using "Better Together" Imagine Cartridge. If you don't have an Imagine, you could used Forever Young. There are lots of ladies on it.
The Sentiment is a Close To My Heart Acrylix Stamp "Card Chatter-Birthday". This stamp set has the sentiment for the outside and the inside.
This is the inside.
Thanks so much for visiting with us today. I hope Donna is having a relaxing vacation. She needed one. It's bad when you go on vacation and then need a week to rest up from your vacation. That's how it goes a lot of the time. God Bless You!!! Peggy
Hi Everyone - well, I've fallen in love again! With who or what you ask? My Imagine!!!! I just made a card in less time than it normally takes me because I used my Imagine and the Best Friends cartridge.
I printed the yellow background paper and the cloud background paper. I then printed the frame and all the layers at 5". I then cut the tree limbs and birds at 1" and the label on the front at 1.25".
I pop dotted all the layers on top of each other and attached it to the yellow background paper.
Challenge for this card:
I really like how this card turned out and how easy it was to make. Thank you so much for stopping by today - we hope you'll come back again soon! Until another day, God Bless You!! Donna
Don't forget, you still have time to join in the Fantabulous Harvest Blessing Cricut Crawl. Just click here. Mom is giving away a $10 Michael's gift card.
For the last couple of days I've been working on a project to get my Imagine cartridge patterns and colors organized. I wanted to have them all readily available so I wouldn't have to thumb through all the handbooks to find one of them. I read on the Cricut Message Board that some have printed circles and cut them, then put them on a ring. I know I have some of those rings somewhere but I have no clue as to where they are. Now Imagine that. LOL. So in talking with Donna we came up with the idea of a notebook.

I took each cartridge and printed all the patterns and colors (separate pages for each) on a sheet measuring 8 1/2 X 11. I used the circle that comes on the Imagine and made it 1.7 in. Twenty of this size fit on a page. The reason for doing this is to have an accurate picture of how it's going to print on my machine. Now when I need a certain color or pattern, I can flip through my notebook and find exactly what I'm looking for. It's a little time consuming but I hope it will be worth it. Here are a few pictures to demonstrate what I did. Don't you just love those Berries & Cream colors?
Thanks everyone for visiting today. I hope your weekend is blessed beyond measure. God Bless You!!! Peggy
Hi Everyone - well, Mom's off visiting the other grandsons so she's left me in charge. OMGoodness - now those are big shoes to fill. I got home this evening after 9:00 p.m. and still needed to make a Thank You card for my boss. So I needed something quick!! Here's what I came up with - simple but oh so cute!!
Card Recipe:
A2 cardbase
Pattern Paper - Better Together cut at 5" x 5"
Thanks - Better Together cut at 1" x 1"
Turquoise Bazzill Cardstock
Ribbon
I covered the cardbase with the printed paper and then used a Martha Stewart punch on the Turquoise Cardstock - tied ribbon, popped sentiment, and VOILA - we have a Thank You card!!
Now just how easy is that? Well, I hope you enjoyed your visit today and that you'll come back another day. Until another day, God Bless You!! Donna
Hi Everyone!! A few weeks ago, my mom enabled me into buying the new Provocraft machine, "The Imagine!" Did you hear the angels from the Heavens singing? I positively LOVE this machine. I needed a birthday card for one of my best friends so I decided that I was going to make it with my Imagine and the Better Together Imagine Cartridge.
Card Recipe:
Background Paper - printed and cut at 7" x 7" and cut to fit the pre-cut 5 x 7 cardbase
Scalloped Square - printed and cut at 5" x 5"
Flower with Face/Butterfly - printed and cut at 4" - cut 2 and popped for dimension
Flower without face - printed and cut at 3.5"
Inside of card:
Flower with Face/Butterfly - printed and cut at 3.5"
Tulip - printed and cut at 3"
Used remainder of Background paper from the front to decorate edges on inside of card
Sentiments were generated with Microsoft Word
When the Imagine first came out, I told Mom that I would never buy one of those! HA, the old adage of "Never Say Never" is sooooo true!! I'm glad Mom enabled me. She was just paying me back for all the times that I've enabled her into buying something!!
We appreciate your visits and your comments! Please come back again tomorrow - we'll be here! Until another day, God Bless You! Donna
At Heart Song Challenges today we were asked to include a mini-tutorial with our challenge card. I chose Leah's "Jaspar" to make my card. Rather than color him I printed him on pattern paper. I did color his little heart nose.
Card Recipe:
A2 Card Base
Background Paper - KandCo. - Classic K. Bailey Paper Stack
Digital Image - Jaspar from Heart Song Designs Store
Martha Stewart - Lattice Punch Around The Page Punches
Fanfold Paper Flower - Cut 12" strip from cardstock or pattern paper. Determine how wide you want your flower to be and cut the strip of paper half that width, i.e., if you want your flower to be 3" cut strip 1 1/2 in. wide. Use scoreboard to score 12" strip every 1/4". Fanfold strip, Glue the ends together. Gather up like a teepee, then push down to form flower. Adhere to a 1 1/4 circle of paper. Be sure to push center together as much as you can. Decorate with an embellishment on top.
I know most of you already know how to make this flower so thanks for allowing me to go on about it. Thank you for stopping by today. We love your visits and comments. God Bless You!!! Peggy